This page contains some of my Android programs. It is not a tutorial page but a sort of inventory instead. Most of the projects handles the phone as a sensor - mainly a camera - as it can be used as an extension for a mobile robot. For example EV3DroidCV uses LEGO EV3 kit, a mobile, and OpenCV library to follow a blue ball.
Formerly I have used Eclipse because it had support for OpenCV for Android library but in the last few years Android Studio became the quasi-standard development tool for Android.
Android Studio works without problems:
- It could import Eclipse projects (of course, reorganization cannot be avoided which means some extra work using version control).
- Updates itself and its components. It means extra time and download bandwidth but almost automatic.
- I do not need to install virtual devices. Deploying to the phone itself was relatively quick (after installing the phone's Android API version, of course).

This demo shows a ball rolling on the surface of the device as response to pitch and roll components of the rotation vector of the rotation sensor. This sensor is not available in every device my Samsung SM-T800 tab has it.
First of all it is necessary to register a listener in the sensor manager to receive values from the selected sensor type.
Then rotation vector components are received in a sensor event as described
here.
The getRotationMatrixFromVector function converts the rotation-vector to a 4x4 rotation matrix
and getOrientation determines the angle of rotation around the three main axis.
Response of the ball to device orientation changes are calculated using Newton's laws of motion.
The complete source can be downloaded from github.

This program tries various possibilities using the camera from Android. It only handles Camera 1 API what became obsolete with the introduction of Camera API 2 in API level 21. Unfortunately the APIs are incompatible, developers have to write separate code for both cases if they want to use both. As I still have devices that has lower API level than 21 I prefer to use API 1.
So the program includes the following functions:
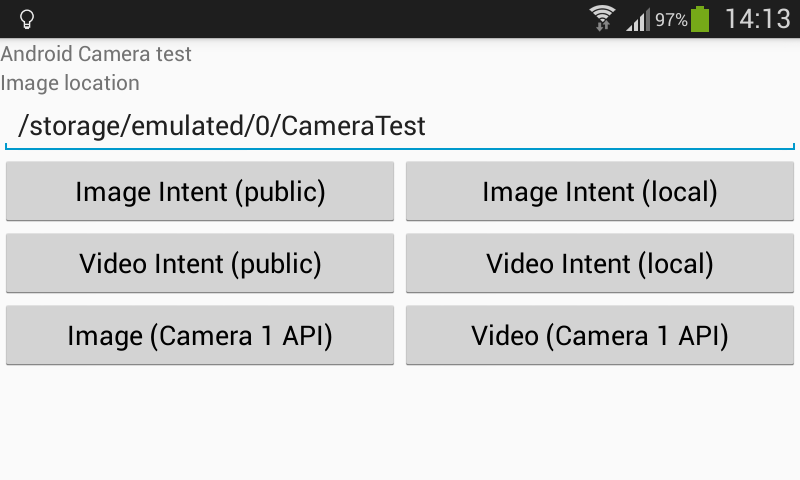
- Image intent (public)
Calls the built-in camera intent of the device delegating photo shooting to an operating system-level program code. This choice is based on the basic photo capturing tutorial.
Intents are good when the programmer does not want more than regular functionality. If certain extra processes need to be performed with each image then the own solution is preferable. For the intent usage we need to create it with appropriate action type,
ACTION_IMAGE_CAPTUREin this case. Here is how this intent looks like: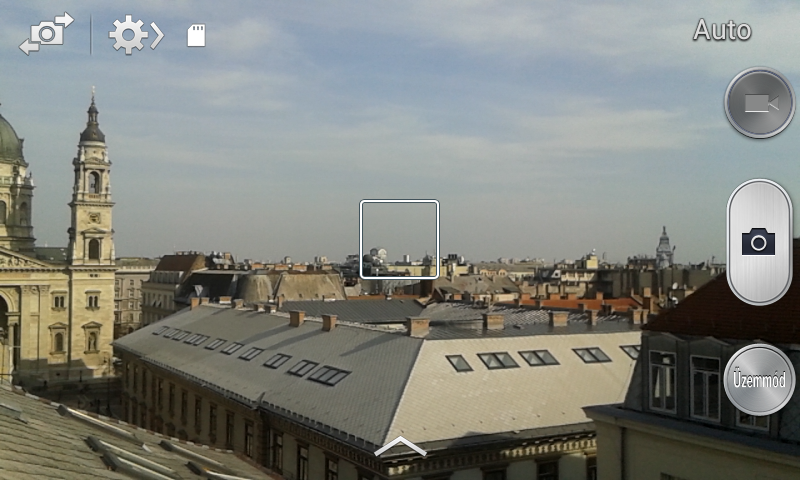
Then a file has to be added as a parameter of the intent. We create a file in the public storage space whose location is determined by
getExternalStoragePublicDirectoryand add the file to the intent with theputExtra(MediaStore.EXTRA_OUTPUT, photoURI)method. The intent is started withstartActivityForResultmethod including a request code parameter to uniquely identify the request later when we process the result in theonActivityResultmethod.private void dispatchTakePictureIntent() { Intent takeCameraIntent = new Intent(MediaStore.ACTION_IMAGE_CAPTURE); if (takeCameraIntent.resolveActivity(getPackageManager()) != null) { photoFile = null; try { photoFile = createImageFile(); } catch (IOException ex) { Log.e(CameraTest.TAG,"Photo file cannot be created:" + ex); } if (photoFile != null) { Uri photoURI = FileProvider.getUriForFile(this, "hu.rics.cameratest.fileprovider", photoFile); List<ResolveInfo> resInfoList = getPackageManager().queryIntentActivities(takeCameraIntent, PackageManager.MATCH_DEFAULT_ONLY); for (ResolveInfo resolveInfo : resInfoList) { String packageName = resolveInfo.activityInfo.packageName; grantUriPermission(packageName, photoURI, Intent.FLAG_GRANT_WRITE_URI_PERMISSION | Intent.FLAG_GRANT_READ_URI_PERMISSION); } takeCameraIntent.putExtra(MediaStore.EXTRA_OUTPUT, photoURI); startActivityForResult(takeCameraIntent, REQUEST_IMAGE_CAPTURE); } } } private File createImageFile() throws IOException { String timeStamp = new SimpleDateFormat("yyyyMMdd_HHmmss").format(new Date()); String imageFileName = "JPEG_" + timeStamp + "_"; String dirType = Environment.DIRECTORY_PICTURES; File storageDir = getExternalStoragePublicDirectory(dirType); if( !storageDir.exists() ) { storageDir.mkdirs(); } File image = File.createTempFile( imageFileName, ".jpg", storageDir ); return image; }We do not simply give a file reference to the intent because - according to the documentation - it is better to use
FileProvider.getUriForFilefor sharing access to a file from another program or intent. The former is insecure and will result an exception on future Android versions (with API level 24 and higher). For this reason we have to define a file provider in theAndroidManifest.xmllike this:<provider android:name="android.support.v4.content.FileProvider" android:authorities="hu.rics.cameratest.fileprovider" android:exported="false" android:grantUriPermissions="true"> <meta-data android:name="android.support.FILE_PROVIDER_PATHS" android:resource="@xml/file_paths"></meta-data> </provider>Then the
file_paths.xmlshould contain the paths that we intend to share with the clients of our program. There are various ways paths can be set and each one means a different access level to the file. For a publicly available fileexternal-pathis the right choice which represents directories relative to the root of the external storage directory. So ourxmlshould contain the following path:<?xml version="1.0" encoding="utf-8"?> <paths xmlns:android="http://schemas.android.com/apk/res/android"> <external-path name="my_images_public" path="Pictures" /> ... </paths>After setting the path as above the all files in the
Picturesdirectory will be accessible for the intent. From the program itself the reference to this directory isgetExternalStoragePublicDirectory(Environment.DIRECTORY_PICTURES).
One more problem is that using FileProvider from support library requires extra call tograntUriPermissionmethod as in the above code as Leszek points out otherwise the intent cannot access the files. This problem only raises on my Android API level 17 device but not on API level 23 one. (Moreover I should also check if the external storage is mounted.)- Image intent (local)
Using image intent locally does not differ significantly from the previous choice. The image is saved to a directory that is local to the project. It means that if the project is deleted the local directory is removed as well. The
file_paths.xmlhas to contain anexternal-files-pathelement. The path determined byexternal-files-pathis relative to the root of the application's external storage area. It isAndroid/data/hu.rics.cameratest/fileson my devices so setting<external-files-path name="my_images_private" path="Pictures" />in the xml means that images will be saved toAndroid/data/hu.rics.cameratest/files/Pictures.It would also be possible to use
files-pathinstead of the external but files stored there are so internal that the media viewer cannot access them.To refer this directory
getExternalFilesDir(Environment.DIRECTORY_PICTURES)has to be used.- Video intent (public)
Calls the built-in camera intent of the device delegating video recording to an already existing program code. After setting the path like this in the xml
<external-path name="my_videos_public" path="Movies" />videos are saved to theMoviesdirectory of the external storage and can be referred asgetExternalFilesDir(Environment.DIRECTORY_MOVIES). The appropriate intent type in this case isMediaStore.ACTION_VIDEO_CAPTURE. All other elements of the program is the same as for the case of taking a picture.Another twist for video recording is that setting MediaStore.EXTRA_OUTPUT crashes in same cases. It is the same for my API level 17 device. To make a workaround I save the video in
onActivityResultmethod.- Video intent (local)
The code is the same as above. Only
external-files-pathis set as<external-files-path name="my_videos_private" path="Movies" />, the reference to this directory isgetExternalFilesDir(Environment.DIRECTORY_MOVIES), and the intent type isMediaStore.ACTION_VIDEO_CAPTURE.- Photo shoot
It takes a photo after a button click and saves the image.
The solution is based on the Camera API description. First of all the camera has to be opened with theCamera.openfunction. ThensetPreviewDisplaysets the place where the camera preview will appear on aSurfaceHolder. After that the preview can be started. During preview mode a picture can be taken withtakePicture. A callback of this method ensures that the image is saved to the external storage. The name of the file to be saved is given from the caller activity within a String intent parameter. The following code shows the callback and file saving:public void saveDataToSDFile(String filename, byte[] data) { String ext = ".jpg"; FileOutputStream fOut = null; try { if (Environment.MEDIA_MOUNTED.equals(Environment.getExternalStorageState())) { File file = new File(filename + ext); fOut = new FileOutputStream(file); fOut.write(data); fOut.flush(); } } catch (FileNotFoundException ex) { Log.e(CameraTest.TAG,ex.toString()); } catch (IOException ex) { Log.e(CameraTest.TAG,ex.toString()); } finally { if (fOut != null) { try { fOut.close(); } catch (IOException ex) { Log.e(CameraTest.TAG,ex.toString()); } } } } Camera.PictureCallback mPictureCallback = new Camera.PictureCallback() { public void onPictureTaken(byte[] imageData, Camera c) { if (imageData != null) { saveDataToSDFile(getIntent().getStringExtra(getString(R.string.INTENT_PARAM_FILENAME)),imageData); setResult(FOTO_MODE); finish(); } } };There is one last problem with the preview: its orientation is not always upside down as expected. It depends on the specification of the device, in other words, how the front/back camera is mounted, and it also depends on the actual rotation of the device. The suggested solution can be found in the Camera API reference as follows.
public static void setCameraDisplayOrientation(Activity activity, int cameraId, android.hardware.Camera camera) { android.hardware.Camera.CameraInfo info = new android.hardware.Camera.CameraInfo(); android.hardware.Camera.getCameraInfo(cameraId, info); int rotation = ((WindowManager)context.getSystemService(Context.WINDOW_SERVICE)).getDefaultDisplay() .getRotation(); int degrees = 0; switch (rotation) { case Surface.ROTATION_0: degrees = 0; break; case Surface.ROTATION_90: degrees = 90; break; case Surface.ROTATION_180: degrees = 180; break; case Surface.ROTATION_270: degrees = 270; break; } Log.i(LibraryInfo.TAG,"info orientation:" + info.orientation + " rotation:" + degrees + ":"); int result; if (info.facing == Camera.CameraInfo.CAMERA_FACING_FRONT) { result = (info.orientation + degrees) % 360; result = (360 - result) % 360; // compensate the mirror } else { // back-facing result = (info.orientation - degrees + 360) % 360; } return result; }- Video recording
- It records a video after a button click.
The process is based on photo shoot and requires some more steps. After starting the preview the camera has to beunlocked to allow the media process to access it. Then aMediaRecorderobject has to be created that will perform video recording. BeforeMediaRecorder.prepareandstartvarious parameters have to be set according to the user's need. These parameters include the camera, the audio and video source, the output file, the profile containing video size and frame rate information. Orientation hint is also set at this point to ensure the video file will contain a hint for video player to rotate the stream accordingly. Calculation of correct rotation angle is the same as above.
At the end of the recordingMediaRecorderhas to be stopped and released and then the camera has to be locked again.
The whole program can be downloaded from github. Media recording elements are organized into a separate library as described below. This library is Camera1Util.
As with every other language and framework it is good to reuse code in Android. One way of avoiding code repetition is the usage of libraries. As I wanted to handle camera preview and media recorder from various projects I created Camera1Util.
Although Google has a recommendation
on how to use libraries but according to philosophicalhacker this setup means that you have to have copies of a library for every app that depends on it
.
Since I want to avoid this "feature" I followed
his method.
- I have create the Camera1Util Android Studio project. I created a new library module, named camera1util in this new project.
The project's app folder is empty, everything is defined in the
camera1utilfolder. - The
settings.gradlefile of the main program (the one that uses Camera1Util library) is extended with the following rows, (Please note that../Camera1Util/camera1utilis valid because Camera1Util and Camera1Test are placed in the same directory next to each other):include ':camera1util' project(':camera1util').projectDir = new File('../Camera1Util/camera1util')After I refresh/reopen the main projectcamera1utilappears in the Project tab. - The
app/build.gradlefile of the main program is extended with an extra dependency:dependencies { ... compile project(':camera1util') ... }From this point it is possible to import classes from Camera1Util.
Advantages of this solution is that:
- There is no code repetition, everything is in the module.
- The library is visible from the main program, it can be edited, compiled as well.
- The same library can be used in several programs simultaneously.
Beginning in Android 6.0 (API level 23), users grant permissions to applications while the
app is running, not when they install the app.
Permissions can be granted at a specific point of the execution and they can be revoked when not needed.
It means a more flexible and dynamic handling of permissions.
All required permissions have to be enumerated in AndroidManifest.xml like this:
There are normal and dangerous permissions depending on the risk that the user's privacy is affected or not. Normal permissions are automatically granted.
If the device's API level is below 23 then all required dangerous permissions need to be granted during installation
there is no way to postpone user interaction to the first usage of the permission.
From API level 23 before the usage of a dangerous permission
it is necessary to check whether the permission has already been granted using ContextCompat.checkSelfPermission.
Given a negative response the programmer has to request the permission with ActivityCompat.requestPermissions.
This function does not return with a yes-no value, in other words, there is no direct answer to the request:
the running program opens a dialog to the user and waits for the answer without blocking the execution
(e.g. screen orientation can change in the meantime).
The response to the request returns to the onRequestPermissionsResult event handler method of the running activity.
If the user grants the permission then the execution can move using the permission.
If not then it is useful to show a rationale about the permission request to explain to the user why the permission is needed.
After a denial when the user executes the program for the second time the permission request dialog appears again,
in this case the dialog includes a Never ask again checkbox. If the user clicks the checkbox then
the permission request dialog will never show up again for this permission.
To avoid user annoyance after that it is a good habit not to display the rationale again and again. The
ActivityCompat.shouldShowRequestPermissionRationale method comes handy in this case because
it return false when the program should not show the description explaining the importance of the permission.
The program has to be prepared for the situation when a required request is not granted. For example the extra feature has to be disabled. In case of the Camera API 1 program there is nothing to do without camera permission so the program simply does not do anything.
A thorough description of the permission handling can be found here. This page also explains the handling of multiple permissions and the correct way to handle devices with API level below and above 23 with the same code.
Based on the above I have created a library to handle permissions uniformly from all of my programs. The library can be found on github.

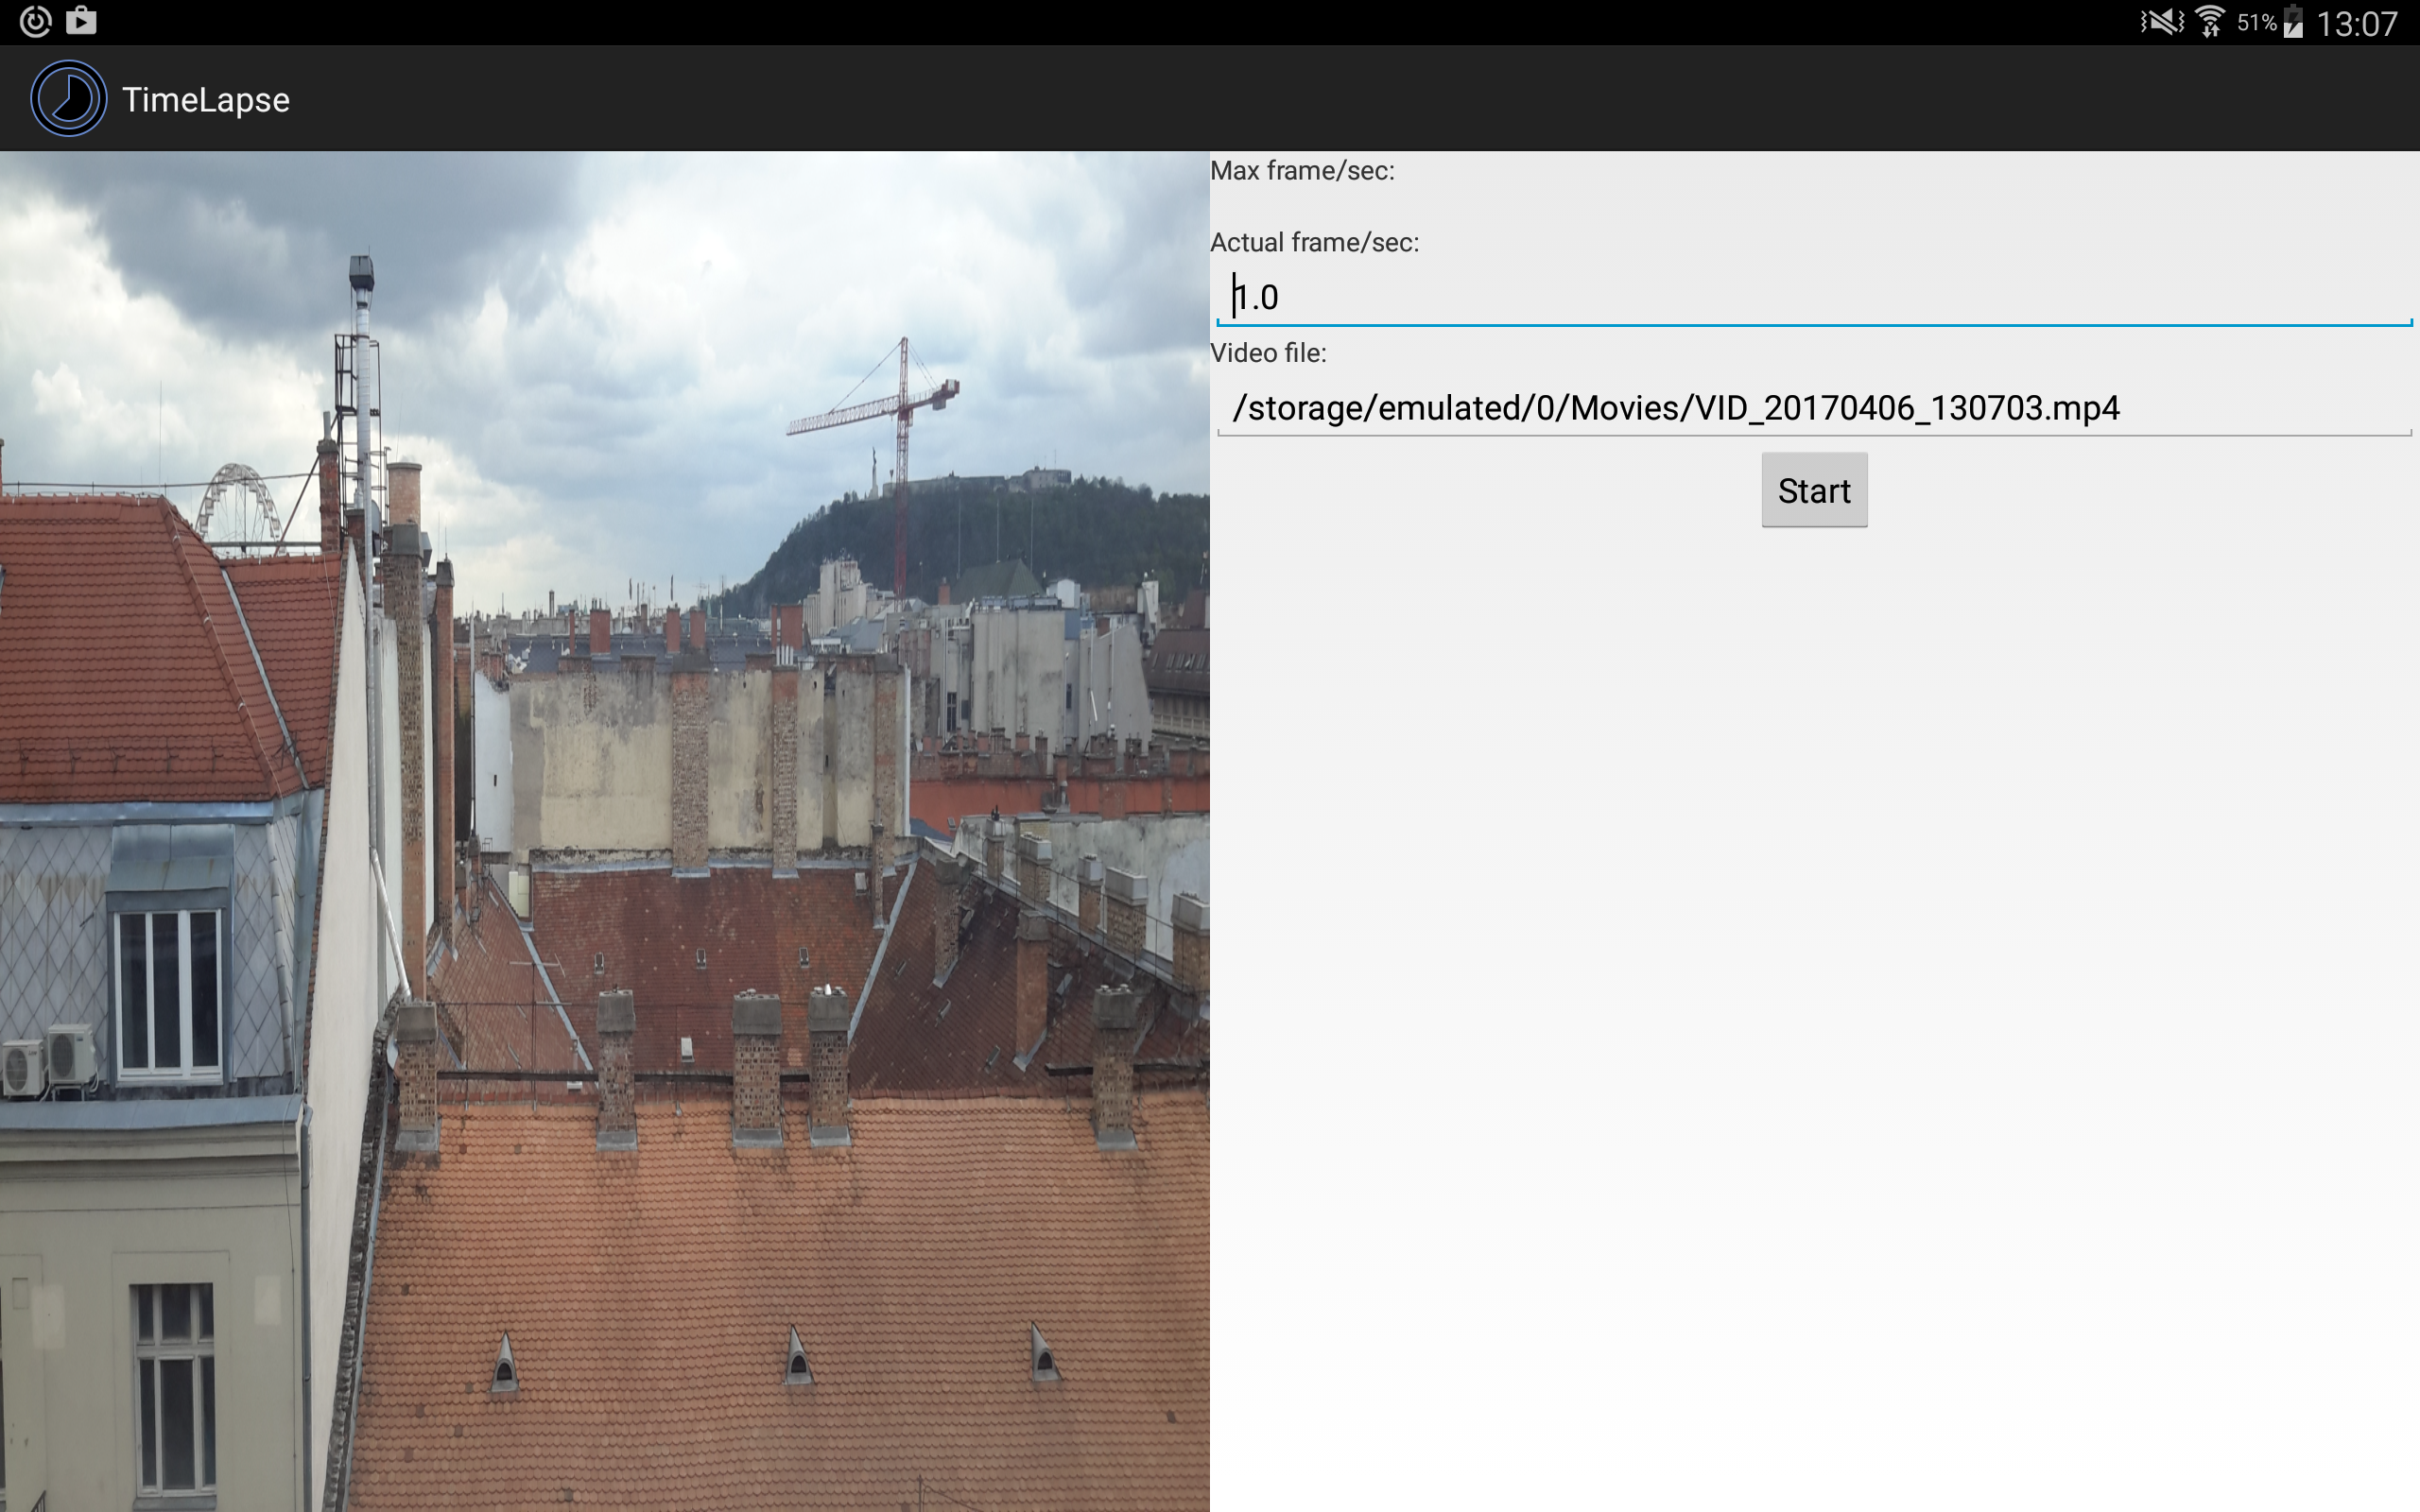
Time lapse videos contains less frame per seconds then classical videos and when played back at normal speed they seems like a fast motion movie. This nice effect is available in some devices but not in all. Moreover selection of recording speed can be limited.
This small program tries to record a video in 720p resolution with a pre-selected frame rate.
The handling of MediaRecorder is similar to the case of Camera 1 API, only the profile i set to
CamcorderProfile.QUALITY_TIME_LAPSE_720P.
The complete source can be downloaded from github.
A test video on youtube.

The aim of this project is to send video data online among devices, in other words to stream media. The camera of the sending device is turned on and the video is broadcasted to all clients.
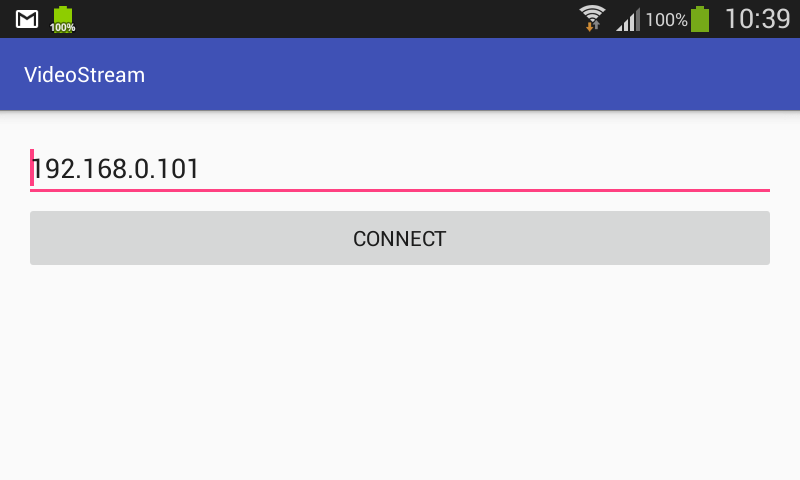
The same application can be used on broadcaster's and on receiver's side, roles have to be decided after program startup. The only parameter of the broadcaster is the image size to be sent. Possible values are selectable from a device-dependent list before clicking on the Send button as it can be seen in the image below.
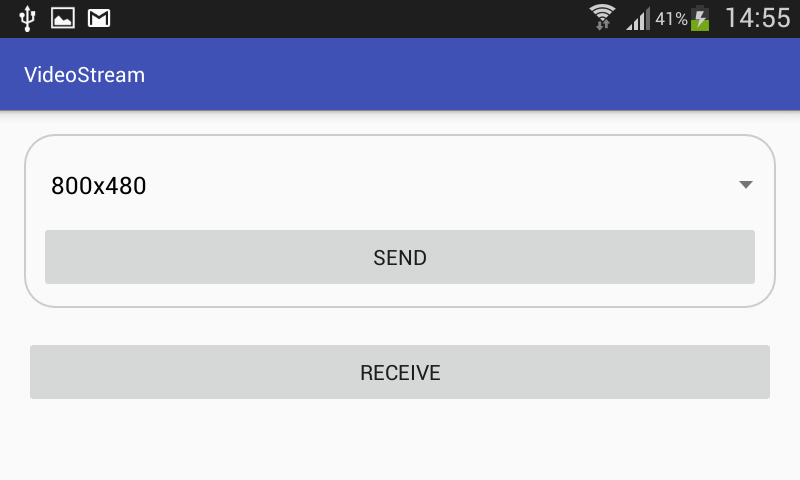
As the broadcaster starts the sending it shows a preview image of the selected size. Moreover it writes the IP address of the device at the top of the screen. The receiver of the stream has to know the broadcaster's IP address before connection. So after clicking Receive the user has to set the IP address correctly and then pressing Connect establishes the connection and the remote video becomes visible.
Broadcaster and receivers must be on the same network. It either can be Wi-Fi or a Bluetooth PAN. The latter function is a built-in feature of Android 4.0 or newer devices. One of the phones share its internet connection with other phones and gives unique IP addresses to each connected device. Proper setting of connection between Android and Windows desktop is described here, connecting Android to Android is similar. The advantage of this method we do not need an internet connection at all. Even the device that shares its network vie the Bluetooth PAN can work without Wi-Fi or mobile net so the streaming can be performed even in the forest as long as the devices are within Bluetooth communication range.
Communication is solved by sockets: the sending device creates a server socket and a receiver connects to the server via its socket.
Both processes are executed in the background with AsyncTask in SenderCommunicator
and in ReceiverCommunicator classes.
When the connection has been established the onPreviewFrame method
in the StreamingCameraPreview class sends the selected image size to each receiver and then actual image byte array.
Without knowing the image width and height it would not be possible the decode the images in the receiver's side.
The byte array representing the images in onPreviewFrame are encoded in
YUV420SP format.
Since YUV420SP requires less bytes to represent the image than the preferred RGB888 format we do no change
the image format on the broadcaster's side. The only modification here is the rotation of the image by rotateYUV420Degree90 method
if the camera orientation and the current rotation of the device makes it necessary.
Image is then transformed from YUV420SP to RGB888 format on the receiver's side with decodeYUV420SP
to create a displayable bitmap. The conversion is a bit tricky - there are various invalid code snippets around
the web that confuses different YUV formats -
but using
the above algorithm
and this pixel value transformation
does the job.
Although the program works nicely with the above structure one concern is the speed. Putting the broadcaster and one receiver next to each other the delay between sending and receiving is clearly visible. It could be seconds before the same image appears on the receiver. Of course in depends on the capabilities of the used hardware but selecting large image sizes or adding too much receivers to the network signigicantly slows the the process. One possible speedup would the usage of the Renderscript framework designed for computationally intensive tasks utilizing parallel core possibilities. Until now I could not use this sparsely documented library.
The complete source can be downloaded from github.
It also contains a Java application in the VideoStreamReceiverDesktop directory that I used during testing but this program is useful in its own right. It is a Swing-based Netbeans project to receive the video on a non-Android device as well.